
1. Click on Services at the top of the screen
2. Click on Manage Services in the dropdown box
3. Highlight and click on the appropriate account
4. Click on Manage Cloud Services
5. You are now in the control panel.
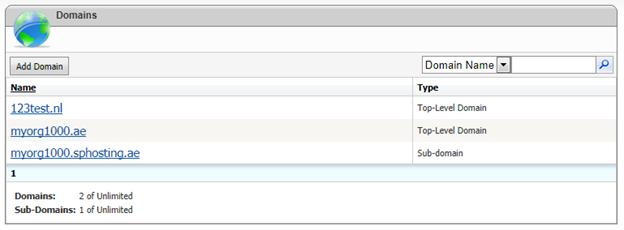
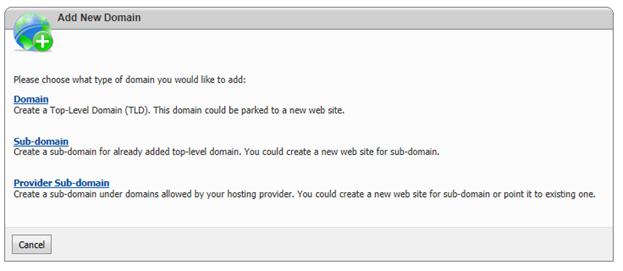
6. Click on the Domains icon. You will see a list of domains as shown in the example below:
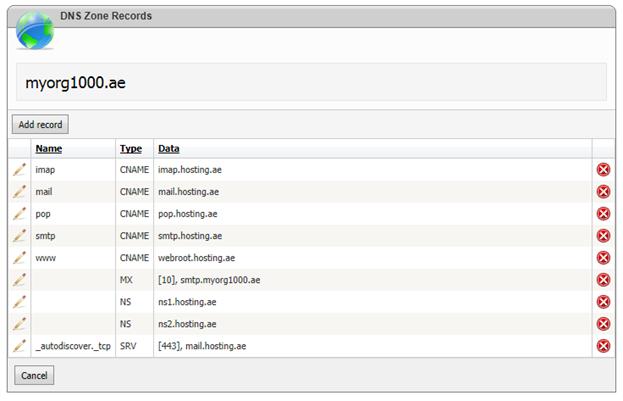
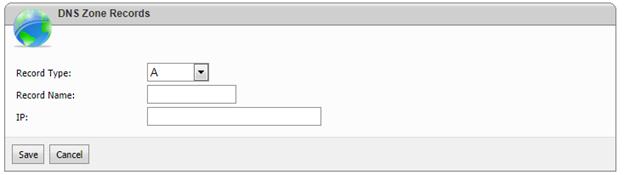
A records
A records translate your website's URL into an IP address. An example of a A-record would be www.cera.net > 75.98.224.9?.
If you are hosting a web site then you will likely want to create two A records as follows:
For the first record, you will leave the Record Name empty and simply specify the IP address of your web site. This will allow your web site to come up if somebody types just the Top level domain in the address bar (i.e. mydomain.com).
For the second record, specify "www" for the Record Name and specify the IP address of your web site. This will allow your web site to come up if somebody type the fully qualified domain in the address bar (i.e. www.mydomain.com).
NS records
NS Records dictate the name servers to be queried. These are required and should already be in place with names dns1.cera.net and dns2.cera.net.
MX records
MX Records point to the service that handles email traffic. They are also associated with a priority, in case there are more than one.
CNAME records
CNAME records translate one URL into another. For example, ftp.domain.com > domain.com would be practical if your server had both FTP and HTTP functions.
TXT records
TXT Records are places to store arbitrary text information. Most commonly used to validate the source of emails and other communications in the form of an SPF record, so that other senders can't fake their email address to look like someone else.
Here is a good explanation via Wikipedia: If a domain publishes an SPF record, spammers and phishers are less likely to forge e-mails pretending to be from that domain, since the forged e-mails are more likely to be caught in spam filters which check the SPF record. Therefore, an SPF-protected domain is less attractive to spammers and phishers. Since an SPF-protected domain is less attractive as a spoofed address, it is less likely to be blacklisted by spam filters and so ultimately the legitimate e-mail from the domain is more likely to get through.
You generally will want to leave the Record Name blank. Specify the actual SPF record in the Record Data field. An example may look like the following:
v=spf1 a mx ip4:10.10.50.0/29 a:mail.mydomain.com mx:mydomain.com -all
Where, 10.10.50.0/29 is your assigned subnet from which you will be sending email. This is just a simple example and you should create a properly formed SPF record based on your requirements. Microsoft offers a really nice online SPF creation wizard to help you. It can be found here.